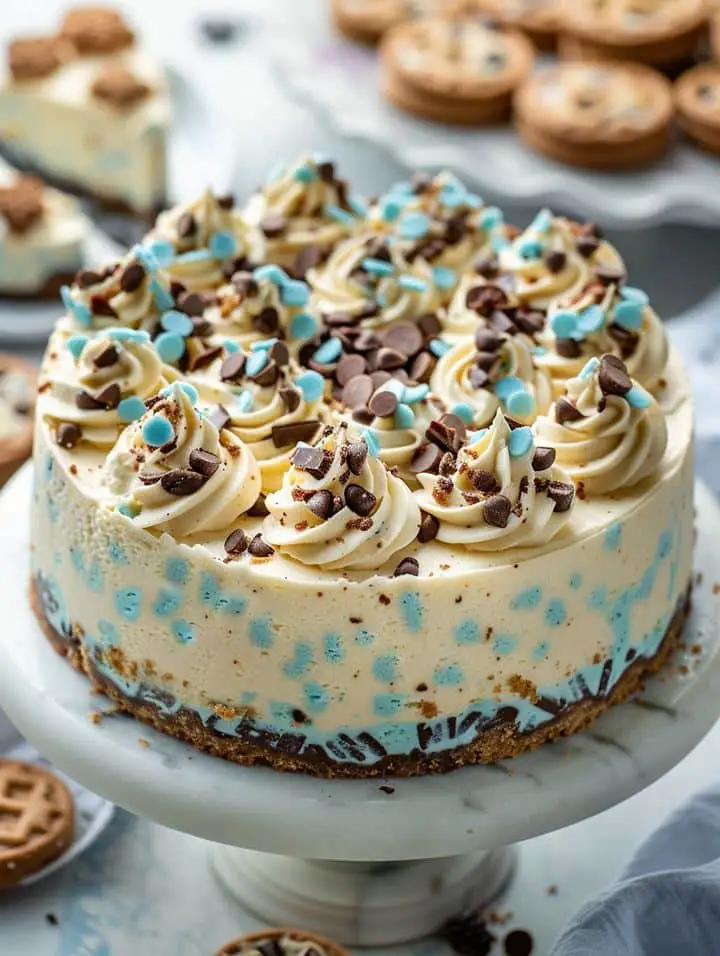
This Cookie Monster Cheesecake is a fun and whimsical dessert that combines a rich cream cheese filling with a delicious chocolate cookie crust. Topped with vibrant blue whipped cream and cookie decorations, it’s perfect for parties, celebrations, or any cookie lover. Indulge in this creamy delight that’s as visually appealing as it is delicious!
Ingredients
For the Crust:
- 2 cups crushed chocolate sandwich cookies (like Oreos)
- 1/4 cup unsalted butter, melted
For the Cheesecake Filling:
- 4 (8 oz) packages cream cheese, softened
- 1 cup granulated sugar
- 1 cup sour cream
- 1/2 cup heavy cream
- 3 large eggs
- 1 teaspoon vanilla extract
- 1 cup mini chocolate chips
For the Cookie Monster Topping:
- 1 cup whipped cream
- 1/4 cup blue food coloring
- 1 cup crushed chocolate sandwich cookies (for decoration)
- Cookie Monster cookie decorations (optional)
Directions
- Preheat your oven to 325°F (165°C). Grease a 9-inch springform pan.
- In a bowl, mix the crushed cookies and melted butter until combined. Press the mixture into the bottom of the prepared pan to form the crust.
- In a large bowl, beat the cream cheese until smooth. Gradually add the granulated sugar, beating until creamy.
- Add the sour cream and heavy cream, mixing until smooth.
- Beat in the eggs, one at a time, and then mix in the vanilla extract.
- Fold in the mini chocolate chips.
- Pour the cheesecake filling over the prepared crust, spreading it evenly.
- Bake for 55-65 minutes, or until the center is set and the edges are slightly puffed.
- Turn off the oven and crack the oven door. Let the cheesecake cool in the oven for 1 hour, then remove and refrigerate for at least 4 hours, or overnight.
For the Topping:
- In a bowl, mix the whipped cream with blue food coloring until you reach your desired shade.
- Spread the blue whipped cream over the chilled cheesecake.
- Sprinkle with crushed cookies and add Cookie Monster cookie decorations if desired.
Servings and Timing
- Prep Time: 20 minutes
- Baking Time: 55-65 minutes
- Total Time: Approximately 6 hours (including chilling)
- Servings: 12 slices
Variations
- Add More Flavors: Incorporate crushed Oreos into the filling for added flavor and texture.
- Change the Color: Use different food coloring to create unique themes for various occasions.
- Fruit Topping: Top with fresh berries for a fruity contrast to the rich cheesecake.
- No Bake Option: Try a no-bake version by using gelatin to set the filling if you prefer to avoid baking.
Storage and Reheating
Store the cheesecake in an airtight container in the refrigerator for up to 5 days. This dessert is best enjoyed chilled, so there’s no need to reheat.
10 FAQs
- Can I use a different type of cookie for the crust?
Yes, feel free to use any type of crushed cookie, such as graham crackers or chocolate chip cookies. - Can I make this cheesecake ahead of time?
Absolutely! This cheesecake can be made a day in advance and stored in the refrigerator. - How can I tell when the cheesecake is done baking?
The center should be set but slightly jiggly; it will firm up as it cools. - What if I don’t have a springform pan?
You can use a regular pie pan, but it may be more challenging to remove the cheesecake. - Can I freeze this cheesecake?
Yes, you can freeze the cheesecake for up to 2 months. Wrap it tightly in plastic wrap before freezing. - How do I prevent cracks in my cheesecake?
Bake at a lower temperature and avoid overmixing the batter. Allow it to cool gradually in the oven. - Can I use low-fat cream cheese?
Yes, but it may alter the texture slightly, making it less creamy. - What if I can’t find mini chocolate chips?
Regular chocolate chips can be chopped into smaller pieces if mini chips aren’t available. - Can I use whipped topping instead of whipped cream?
Yes, whipped topping can be used for the topping if you prefer a non-dairy option. - How should I serve the cheesecake?
Serve chilled, and consider drizzling with chocolate sauce or additional whipped cream for an extra treat.
Conclusion
The Cookie Monster Cheesecake is a delightful and playful dessert that brings joy to any gathering. With its creamy texture and fun toppings, it’s sure to be a crowd-pleaser for both kids and adults alike. Perfect for birthdays, holidays, or just a fun treat, this cheesecake is an indulgent way to celebrate any occasion!
Print
Cookie Monster Cheesecake
- Total Time: 1 hour 25 minutes
Description
Indulge in this fun and delicious Cookie Monster Cheesecake, featuring a rich cream cheese filling, a crunchy chocolate cookie crust, and vibrant blue whipped cream topping. Perfect for parties or a whimsical dessert that’s sure to delight both kids and adults alike!
Ingredients
For the Crust:
- 2 cups crushed chocolate sandwich cookies (like Oreos)
- 1/4 cup unsalted butter, melted
For the Cheesecake Filling:
- 4 (8 oz) packages cream cheese, softened
- 1 cup granulated sugar
- 1 cup sour cream
- 1/2 cup heavy cream
- 3 large eggs
- 1 teaspoon vanilla extract
- 1 cup mini chocolate chips
For the Cookie Monster Topping:
- 1 cup whipped cream
- 1/4 cup blue food coloring
- 1 cup crushed chocolate sandwich cookies (for decoration)
- Cookie Monster cookie decorations (optional)
Instructions
- Preheat oven to 325°F (165°C). Grease a 9-inch springform pan.
- In a bowl, mix crushed cookies and melted butter until combined. Press the mixture into the bottom of the prepared pan to form the crust.
- In a large bowl, beat cream cheese until smooth. Gradually add sugar, beating until creamy.
- Add sour cream and heavy cream, mixing until smooth.
- Beat in eggs, one at a time, then mix in vanilla extract.
- Fold in mini chocolate chips.
- Pour the cheesecake filling over the prepared crust, spreading evenly.
- Bake for 55-65 minutes, or until the center is set and the edges are slightly puffed.
- Turn off the oven and crack the oven door. Let the cheesecake cool in the oven for 1 hour, then remove and refrigerate for at least 4 hours, or overnight.
For the Topping:
- In a bowl, mix whipped cream with blue food coloring until you reach your desired shade.
- Spread the blue whipped cream over the chilled cheesecake.
- Sprinkle with crushed cookies and add Cookie Monster cookie decorations if desired.
Notes
For best results, allow the cheesecake to chill overnight for a firmer texture. You can adjust the amount of blue food coloring to achieve your desired shade. Serve with additional cookie crumbles for extra crunch.
- Prep Time: 20 minutes
- Cook Time: 65 minutes

