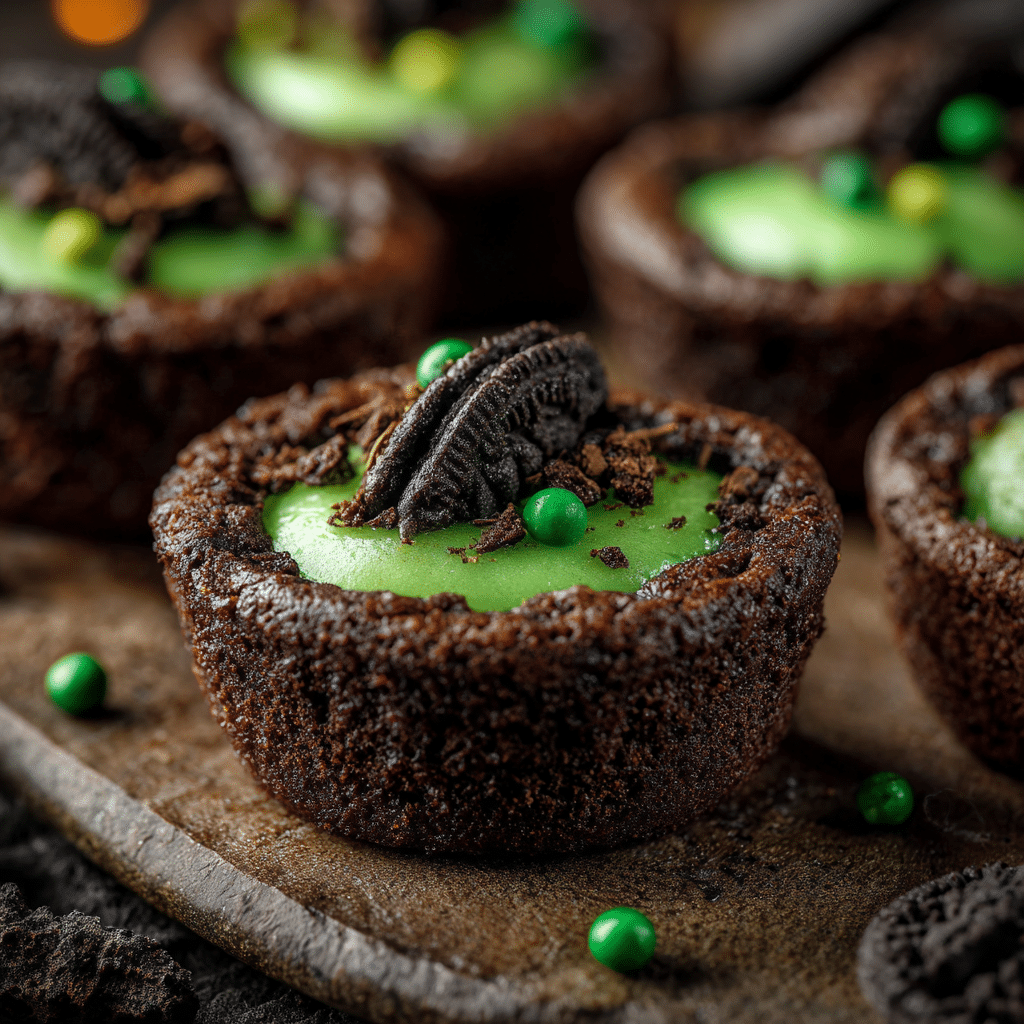
Discover a spooky twist with our Halloween Cauldron Cookie recipe, an easy, fun, and perfect treat to bring festive joy to your celebrations this season. These charming cookies combine simple ingredients with a creative presentation that captures the magic of Halloween. Whether you’re baking with kids or preparing a themed party spread, Halloween Cauldron Cookie is a delicious way to impress and delight.
Why You’ll Love This Recipe
- Festive Fun: This recipe turns ordinary cookies into charming Halloween cauldrons perfect for parties and treats.
- Simple Ingredients: Uses easy-to-find staples so anyone can bake them without hassle.
- Kid-Friendly: Great for involving children in a creative baking project that doubles as a decoration.
- Customizable: Easy to tweak flavors and toppings to suit your taste or dietary needs.
- Eye-Catching Presentation: The bubbling cauldron look makes these cookies a standout on any dessert table.
Ingredients You’ll Need
To make this Halloween Cauldron Cookie recipe shine, you will need simple yet essential ingredients that contribute to the perfect balance of flavor, texture, and spooky charm.
- Chocolate Chips: Use semi-sweet or dark chocolate chips to give the base a rich, gooey texture.
- Oreos or Sandwich Cookies: These form the “cauldron” bowl, offering crunch and structure.
- Green Candy Melts or Frosting: Ideal for creating the bubbling “witch’s brew” effect in your cauldron.
- Marshmallows or Mini Marshmallows: Melted marshmallows create a frothy, magical topping.
- Candy Eyes or Sprinkles: Perfect for adding personality and a dash of spooky fun.
- Edible Glitter or Colored Sugar: Adds shimmer to mimic the eerie glow of a witch’s potion.
Variations for Halloween Cauldron Cookie
Feel free to personalize your Halloween Cauldron Cookie creation any way you like—this recipe is incredibly adaptable based on your ingredients, dietary preferences, or creative vision.
- Dairy-Free Version: Substitute regular chocolate chips and candy melts with vegan-friendly alternatives for allergy-sensitive guests.
- Spicy Twist: Add a pinch of cayenne or cinnamon to the chocolate melt for a subtle, surprising kick.
- Fruit Infusion: Top your cauldron with dried cranberry pieces or chopped cherries for a tangy surprise.
- Gluten-Free: Use gluten-free sandwich cookies or thin brownies shaped into a cauldron shape.
- Extra Gooey: Add a dollop of warm caramel or peanut butter inside before topping for an ooey-gooey center.
How to Make Halloween Cauldron Cookie
Step 1: Prepare the Cauldron Base
Start by selecting Oreo or sandwich cookies with their filling intact; these serve as the cauldron’s body. Gently remove the top cookie half to expose the creamy filling inside, creating a perfect well for your “witch’s brew.”
Step 2: Melt the Chocolate and Candy
Melt semi-sweet chocolate chips in a microwave-safe bowl in short bursts, stirring in between to avoid burning. Separately, melt green candy melts or green-tinted frosting to mimic bubbling potion colors.
Step 3: Assemble the Cauldrons
Dip the Oreo base into the melted chocolate to coat one side, then carefully spoon the melted green candy or frosting into the cookie well. This “brew” should overflow slightly to give a magical bubbling effect.
Step 4: Add Top Decorations
Immediately after pouring the green topping, press mini marshmallows or candy eyes into the “potion” to create bubbles or spooky faces. Sprinkle edible glitter or colored sugar on top for an enchanted shimmer.
Step 5: Let Set and Serve
Allow your Halloween Cauldron Cookies to cool and set on parchment paper until the chocolate and candy harden slightly. This step ensures your spooky cauldrons hold their shape while staying delightfully gooey inside.
Pro Tips for Making Halloween Cauldron Cookie
- Use Quality Chocolate: The flavor depth of good quality chips makes a big difference in taste.
- Work Quickly: Melted candy and chocolate harden fast, so assemble your cauldrons without delay.
- Keep it Cool: Chill the assembled cookies briefly to speed up setting and maintain shape.
- Customize Colors: Experiment with different candy melts to match your Halloween palette.
- Prepare Extras: Keep extra toppings ready so you can decorate the cookies before the chocolate sets.
How to Serve Halloween Cauldron Cookie
Garnishes
Brighten your Halloween Cauldron Cookie with additional candy eyeballs, sprinkles shaped like bats or pumpkins, or a drizzle of contrasting white or orange chocolate to accentuate the bubbling potion effect.
Side Dishes
Serve alongside a hot cup of spiced cider or rich hot chocolate to complement the cookies’ sweet chocolate flavor and add to the cozy Halloween atmosphere.
Creative Ways to Present
Display your cookies on a decorative platter lined with faux spider webs or moss, or place each cookie in mini cauldron-shaped paper cups to heighten the festive vibe and make sharing easier.
Make Ahead and Storage
Storing Leftovers
Store Halloween Cauldron Cookies in an airtight container at room temperature for up to three days to maintain freshness and texture without the chocolate melting.
Freezing
Wrap cookies individually in plastic wrap and place them in a freezer-safe container; they freeze well for up to one month. Thaw at room temperature before serving to preserve the gooey texture.
Reheating
Warm cookies gently in a microwave for 10-15 seconds or in a low oven (about 250°F) for a few minutes to revive the gooey chocolate and soften the candy topping.
FAQs
Can I use other sandwich cookies besides Oreos?
Absolutely! Any sandwich cookie with a creamy center works well, so feel free to experiment with flavors like mint or peanut butter for a unique twist.
How do I prevent the candy melts from hardening before I finish decorating?
Work quickly and prepare all decorations in advance; warming the candy melts slightly during the decorating process can keep them pliable but avoid overheating.
Is this recipe suitable for kids to help with?
Yes! It’s a fun, hands-on baking project perfect for kids under supervision, especially since it involves dipping, spooning, and decorating.
Can I make these Halloween Cauldron Cookies vegan or allergy-friendly?
Definitely. Use vegan chocolate chips, dairy-free candy melts, and gluten-free sandwich cookies to accommodate common allergies or dietary preferences.
How long do the cookies stay fresh?
When stored properly in an airtight container at room temperature, they’re best enjoyed within three days for peak freshness and texture.
Final Thoughts
There’s something incredibly special about bringing the Halloween spirit to life through food, and the Halloween Cauldron Cookie recipe is a delightful way to do just that. With its playful presentation, simple ingredients, and customizable nature, this recipe invites everyone to join in the fun of Halloween baking. So gather your ingredients, get creative, and make your celebrations extra magical this season.
Related Posts
Print
Halloween Cauldron Cookie
- Total Time: 25 minutes
- Yield: 12-16 cookies
- Diet: Gluten Free (if using gluten-free sandwich cookies)
Description
Halloween Cauldron Cookies are a fun, festive treat combining sandwich cookies dipped in rich melted chocolate and topped with a bubbling green candy brew, marshmallows, candy eyes, and edible glitter. Easy to make and customizable, these charming cookies bring spooky delight to Halloween celebrations, perfect for parties, kids’ baking projects, and creative holiday spreads.
Ingredients
Base Ingredients
- Oreos or other sandwich cookies (with cream filling intact) – quantity as desired
- Chocolate Chips (semi-sweet or dark) – about 1 cup
Topping Ingredients
- Green Candy Melts or Green-tinted Frosting – about 1/2 cup
- Marshmallows or Mini Marshmallows – 1 cup
- Candy Eyes or Halloween Sprinkles – quantity as desired
- Edible Glitter or Colored Sugar – quantity as desired
Instructions
- Prepare the Cauldron Base: Start by selecting Oreo or sandwich cookies with the filling intact. Gently remove the top cookie half to expose the creamy filling inside, creating a perfect well for your “witch’s brew.”
- Melt the Chocolate and Candy: Melt semi-sweet chocolate chips in a microwave-safe bowl in short bursts, stirring in between to avoid burning. Separately, melt green candy melts or green-tinted frosting to mimic bubbling potion colors.
- Assemble the Cauldrons: Dip the Oreo base into the melted chocolate to coat one side, then carefully spoon the melted green candy or frosting into the cookie well. This “brew” should overflow slightly to give a magical bubbling effect.
- Add Top Decorations: Immediately after pouring the green topping, press mini marshmallows or candy eyes into the “potion” to create bubbles or spooky faces. Sprinkle edible glitter or colored sugar on top for an enchanted shimmer.
- Let Set and Serve: Allow your Halloween Cauldron Cookies to cool and set on parchment paper until the chocolate and candy harden slightly. This ensures your spooky cauldrons hold their shape while staying delightfully gooey inside.
Notes
- Use quality chocolate for deeper flavor.
- Work quickly as melted candy and chocolate harden fast.
- Chill cookies briefly after assembly to speed up setting and maintain shape.
- Customize colors by experimenting with different candy melts.
- Prepare extra toppings to decorate before chocolate sets.
- Prep Time: 15 minutes
- Cook Time: 10 minutes
- Category: Dessert
- Method: No-bake/Dipping
- Cuisine: American
Nutrition
- Serving Size: 1 cookie
- Calories: 150
- Sugar: 18g
- Sodium: 50mg
- Fat: 8g
- Saturated Fat: 5g
- Unsaturated Fat: 2g
- Trans Fat: 0g
- Carbohydrates: 20g
- Fiber: 1g
- Protein: 2g
- Cholesterol: 5mg


