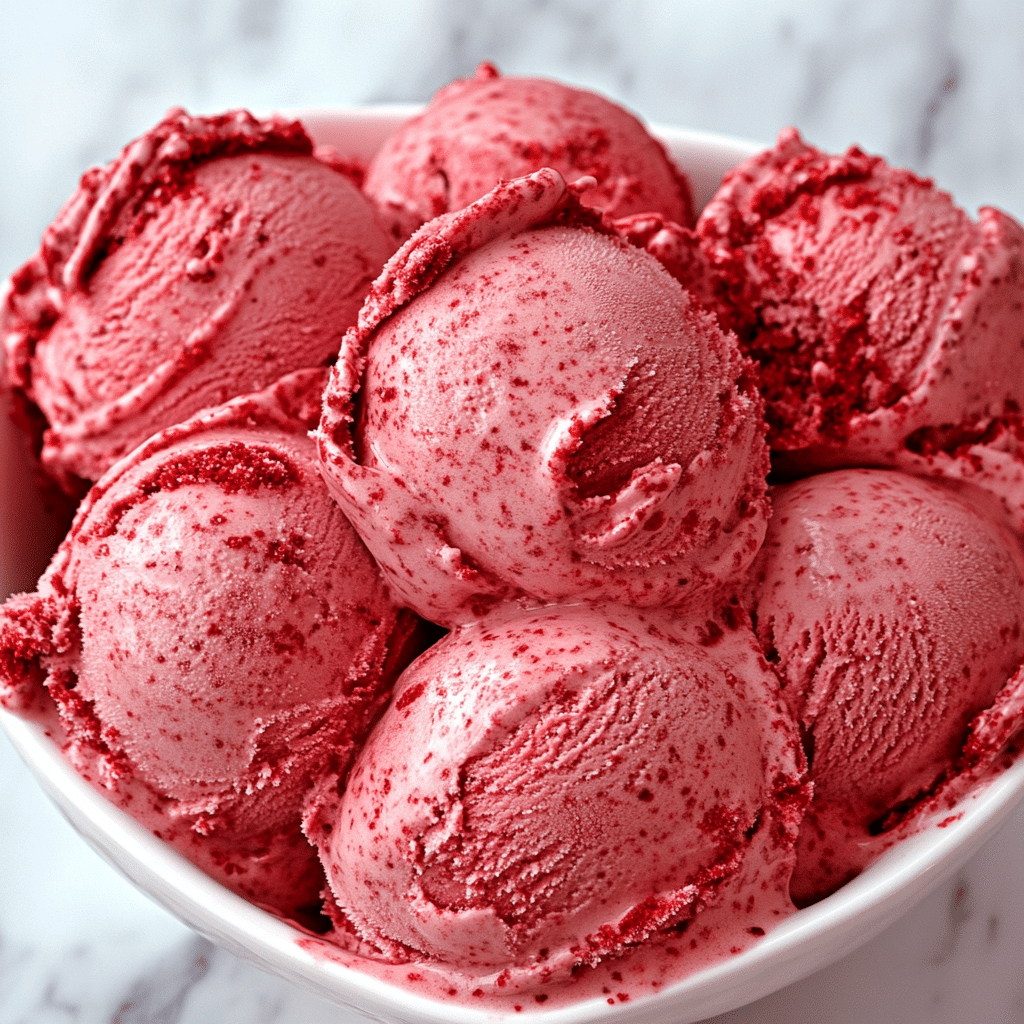
Discover how to make rich and creamy Red Velvet Ice Cream from scratch, combining the classic flavors of red velvet cake with the smoothness of homemade ice cream. This luscious dessert is perfect for any occasion, delivering a velvety texture and subtle cocoa flavor balanced by a hint of tangy cream cheese. Whether you’re a dessert lover or just looking to impress your friends, this Red Velvet Ice Cream recipe offers an irresistible treat that’s surprisingly easy to make at home.
Why You’ll Love This Recipe
- Authentic Flavor Blend: The perfect marriage of cocoa, vanilla, and cream cheese brings out the classic red velvet taste in every creamy bite.
- Rich and Creamy Texture: Made from scratch with quality ingredients, this ice cream boasts a silky smooth texture that melts delightfully on your tongue.
- Customizable Sweetness: You control the sugar level, making it ideal for those who prefer their desserts less or more sweet without compromising on flavor.
- Perfect for Any Occasion: Whether it’s a birthday, holiday, or just a casual treat, this recipe impresses all who try it.
- Simple Yet Impressive: Despite its gourmet feel, the recipe is straightforward enough for home cooks at any skill level.
Ingredients You’ll Need
Each ingredient here plays a crucial role in creating the iconic taste, texture, and eye-catching color of Red Velvet Ice Cream. From the deep red cocoa to the tangy cream cheese, these components come together beautifully to deliver a harmonious and indulgent dessert.
- Whole Milk: Provides the creamy base and helps balance richness with lightness for a smooth finish.
- Heavy Cream: Adds luscious creaminess essential for that melt-in-your-mouth texture.
- Sugar: Sweetens the ice cream just right and helps achieve the proper consistency.
- Cocoa Powder: The secret to that subtle chocolate undertone that defines red velvet flavor.
- Red Food Coloring: Ensures the vibrant, signature red hue that makes this ice cream stand out visually.
- Egg Yolks: Act as natural emulsifiers giving the ice cream a rich and velvety structure.
- Cream Cheese: Provides tanginess and depth, echoing the classic cream cheese frosting found in red velvet cakes.
- Vanilla Extract: Enhances all other flavors with its warm, aromatic notes.
- Lemon Juice (optional): A small splash brightens up the flavor, balancing sweetness with subtle acidity.
Variations for Red Velvet Ice Cream
Feel free to personalize this Red Velvet Ice Cream recipe to suit your taste buds or dietary preferences. It’s incredibly easy to tweak the base and add your own twist while keeping the classic essence intact!
- Vegan Version: Use coconut milk and dairy-free cream cheese to create a plant-based delight without sacrificing creaminess.
- Marbled Chocolate Swirl: Fold in melted dark chocolate for a beautiful and tasty contrast.
- Nutty Addition: Add toasted pecans or walnuts for extra crunch and flavor complexity.
- Berry Boost: Mix in fresh raspberries or strawberry compote for a fruity kick that complements the richness.
- Alcohol Infused: Incorporate a tablespoon of bourbon or cream liqueur for an adult-friendly dessert twist.
How to Make Red Velvet Ice Cream
Step 1: Preparing the Ice Cream Base
Start by combining whole milk, heavy cream, sugar, and cocoa powder in a medium saucepan over medium heat. Whisk constantly until the sugar dissolves and the mixture is warm but not boiling. This step ensures the base is smooth and evenly flavored.
Step 2: Tempering the Egg Yolks
In a separate bowl, whisk the egg yolks thoroughly. Slowly pour about half a cup of the warm milk mixture into the yolks while whisking constantly to prevent scrambling. Then, gradually add the yolk mixture back into the saucepan with the rest of the cream base.
Step 3: Cooking the Custard
Cook the combined mixture over low heat, stirring constantly, until it thickens enough to coat the back of a spoon. This custard step is key for that rich and creamy texture unique to homemade ice cream.
Step 4: Adding Cream Cheese and Color
Remove the custard from heat, add softened cream cheese, vanilla extract, red food coloring, and a splash of lemon juice if using. Whisk until smooth and fully incorporated, then let the mixture cool to room temperature.
Step 5: Chilling and Churning
Pour the custard into a container, cover, and refrigerate for at least 4 hours or overnight to develop flavor and chill thoroughly. Once cold, churn the mixture in your ice cream maker according to the manufacturer’s instructions until it reaches a soft-serve consistency.
Step 6: Freezing Until Firm
Transfer the churned ice cream to a lidded container and freeze for an additional 4 hours or until firm enough to scoop. This final step allows the ice cream to set and fully develop its creamy texture.
Pro Tips for Making Red Velvet Ice Cream
- Use High-Quality Cocoa: Opt for Dutch-processed cocoa powder to achieve the smooth flavor and deep color typical of red velvet.
- Don’t Skip Tempering: Slowly combining warm cream with egg yolks prevents lumps and ensures a silky custard.
- Chill Properly: Allow the custard to cool completely before churning to optimize texture and prevent icy results.
- Balance the Red Color: Use just enough food coloring to achieve a vibrant shade without overpowering the taste.
- Softened Cream Cheese: Make sure the cream cheese is at room temperature before adding to ensure it mixes smoothly.
How to Serve Red Velvet Ice Cream
Garnishes
Sprinkle with crushed red velvet cake crumbs or drizzle with a cream cheese glaze to echo the traditional frosting flavors. Fresh berries or a dusting of cocoa powder also make lovely, simple touches that elevate the presentation.
Side Dishes
Pair your Red Velvet Ice Cream with classic desserts like warm chocolate brownies, vanilla pound cake, or buttery shortbread cookies for an indulgent combo that’s hard to resist.
Creative Ways to Present
Serve the ice cream in mini chocolate waffle cones, layered in parfait glasses with cake pieces, or rolled into milkshakes topped with whipped cream for fun, unique presentations.
Make Ahead and Storage
Storing Leftovers
Keep leftover Red Velvet Ice Cream tightly sealed in an airtight container to maintain freshness and prevent ice crystals from forming. Store it in the coldest part of your freezer.
Freezing
For best results, freeze the ice cream at least 4 hours to reach the perfect firmness before serving. Homemade flavors tend to improve when given extra time for ingredients to meld.
Reheating
You generally don’t reheat ice cream but if it becomes too hard, simply let it sit at room temperature for 5–10 minutes to soften before scooping and serving.
FAQs
Can I make Red Velvet Ice Cream without an ice cream maker?
Yes! You can use the freeze-and-stir method by freezing the mixture in a shallow container and stirring every 30 minutes until creamy, though the texture will be less smooth than with a machine.
What if I don’t have red food coloring?
You can try using natural alternatives like beet juice or freeze-dried raspberry powder for a similar color, though it may alter the flavor slightly.
How long does homemade Red Velvet Ice Cream last?
When stored properly in an airtight container, homemade Red Velvet Ice Cream stays fresh for up to two weeks in the freezer.
Can I add mix-ins like chocolate chips or nuts?
Absolutely! Fold in your favorite toppings during the last few minutes of churning for added texture and flavor.
Is this recipe suitable for people with lactose intolerance?
Not in its classic form, but using lactose-free milk and cream alternatives can make a similar, enjoyable version for those sensitive to dairy.
Final Thoughts
Now that you know how to make this incredibly creamy and flavorful Red Velvet Ice Cream at home, there’s no need to settle for store-bought versions. With just a few simple ingredients and straightforward steps, you can create a dessert that’s truly special. Treat yourself, share with loved ones, and enjoy every luscious scoop of this unforgettable homemade delight!
Related Posts
- Why S’mores Granola Is Your New Snack Crush
- Why Chocolate Strawberry Ganache Tart Delights
- How to Make Perfect Peach Upside-Down Cake

Red Velvet Ice Cream
- Total Time: 8 hours 30 minutes
- Yield: About 1 quart (4 servings) 1x
- Diet: Gluten Free
Description
Rich and creamy homemade Red Velvet Ice Cream combining classic red velvet cake flavors with a smooth ice cream texture, featuring cocoa, cream cheese, and a vibrant red color. Perfect for any occasion, this recipe is easy to make and customizable to your taste.
Ingredients
Dairy and Base Ingredients
- 2 cups whole milk
- 1 cup heavy cream
- 3/4 cup granulated sugar
- 4 large egg yolks
- 4 ounces cream cheese, softened
Flavorings & Color
- 2 tablespoons cocoa powder (preferably Dutch-processed)
- 1 teaspoon vanilla extract
- 1 to 2 teaspoons red food coloring
- 1 teaspoon lemon juice (optional)
Instructions
- Preparing the Ice Cream Base: Combine whole milk, heavy cream, sugar, and cocoa powder in a medium saucepan over medium heat. Whisk constantly until the sugar dissolves and the mixture is warm but not boiling, ensuring a smooth and evenly flavored base.
- Tempering the Egg Yolks: In a separate bowl, whisk the egg yolks thoroughly. Slowly pour about half a cup of the warm milk mixture into the yolks while whisking constantly to prevent scrambling. Gradually add the tempered yolk mixture back into the saucepan with the remaining cream base.
- Cooking the Custard: Cook the combined mixture over low heat, stirring constantly, until it thickens enough to coat the back of a spoon, creating a rich and creamy custard base.
- Adding Cream Cheese and Color: Remove the custard from heat. Add softened cream cheese, vanilla extract, red food coloring, and lemon juice if using. Whisk until smooth and fully incorporated. Allow the mixture to cool to room temperature.
- Chilling and Churning: Pour the custard into a container, cover, and refrigerate for at least 4 hours or overnight to chill thoroughly and develop flavor. Once cold, churn the mixture in an ice cream maker according to the manufacturer’s instructions until it reaches a soft-serve consistency.
- Freezing Until Firm: Transfer churned ice cream to a lidded container and freeze for an additional 4 hours or until firm enough to scoop and serve.
Notes
- Use high-quality Dutch-processed cocoa powder for authentic flavor and color.
- Temper egg yolks slowly to avoid lumps and achieve a silky custard.
- Ensure custard is completely chilled before churning to prevent icy texture.
- Use just enough red food coloring to get a vibrant color without affecting flavor.
- Make sure cream cheese is softened to mix smoothly with the custard.
- For vegan variation, substitute coconut milk and dairy-free cream cheese.
- You can fold in mix-ins like nuts, chocolate chips, or berries during the last stage of churning.
- If no ice cream maker is available, use the freeze-and-stir method, stirring every 30 minutes until creamy.
- Prep Time: 15 minutes
- Cook Time: 15 minutes
- Category: Dessert
- Method: Stovetop and Churn
- Cuisine: American
Nutrition
- Serving Size: 1/2 cup
- Calories: 280
- Sugar: 24g
- Sodium: 90mg
- Fat: 18g
- Saturated Fat: 11g
- Unsaturated Fat: 6g
- Trans Fat: 0g
- Carbohydrates: 26g
- Fiber: 1g
- Protein: 4g
- Cholesterol: 125mg


