Introduction:
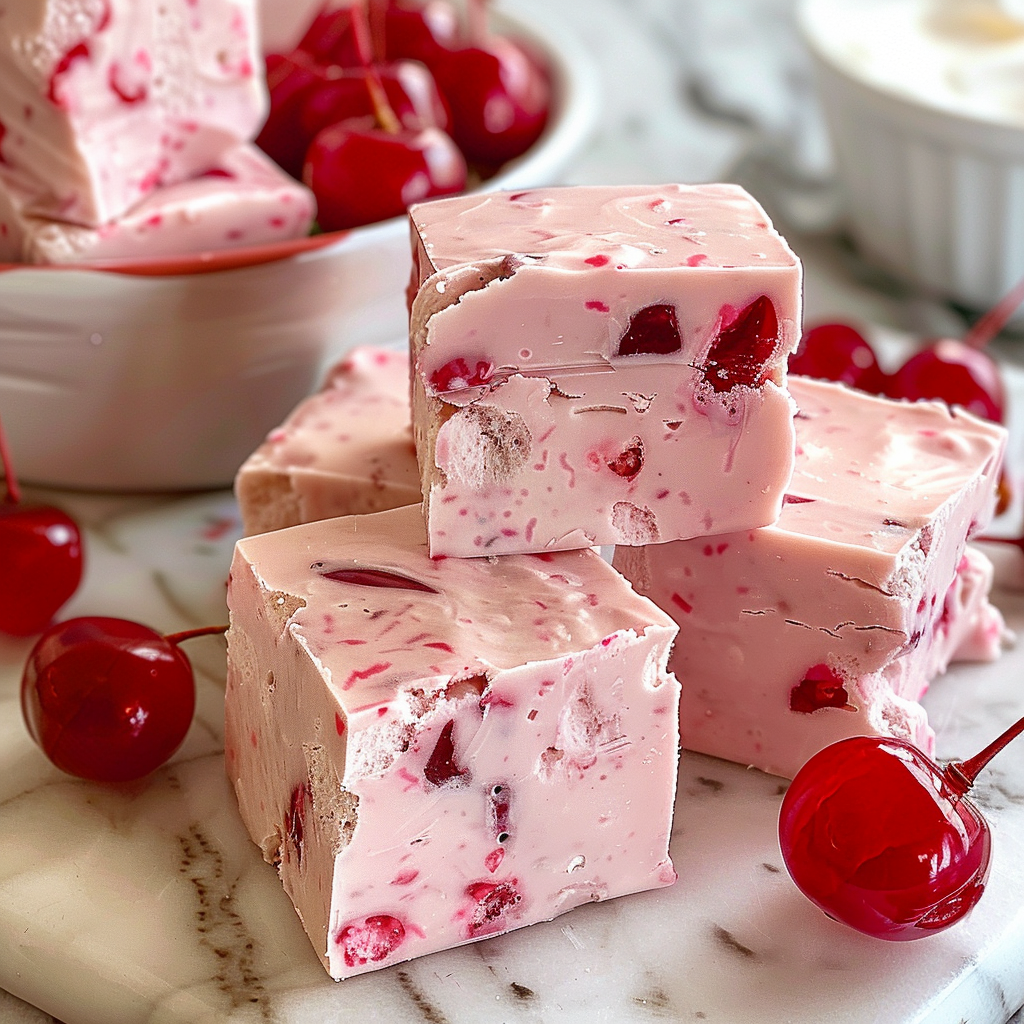
Satisfying your sweet tooth has never been easier with this delectable treat – No-Bake Cherry Fudge. In this article, we’ll explore the irresistible allure of this creamy, fruity fudge that requires no baking, making it a perfect dessert option for any occasion. From its luscious texture to its burst of cherry flavor, let’s dive into why this delightful confection deserves a spot in your recipe collection.
Ingredients:
- 3/4 C finely chopped maraschino cherries Dry between several paper towels about 30 minutes
- 1/2 C unsalted butter room temp
- 2 C sugar
- 3/4 C heavy cream
- 1/2 tsp salt
- 1 1/2 C white chocolate chips
- 3/4 C + 2 TBSP marshmallow cream
- 1 drop of pink food coloring
- 1/2 tsp cherry juice
Instructions:
- Line your 8×8-inch pan by with parchment paper
- Place your diced cherries on a plate and pat dry with a paper towel.
- You must make sure to get as much liquid out as possible, reserving some on the side..
- Using a medium-sized saucepan add the butter, sugar, cream, and salt.
- Over medium-high heat, stir until the sugar and butter melt.
- Bring the mixture to a boil.
- Immediately insert a candy thermometer.
- Continue to cook the fudge, stirring frequently.
- Once the candy thermometer until it reaches 300F remove the pan from the heat.
- Slowly add the white chocolate chips and the marshmallow cream.
- Stir until the chips and cream are melted and combined.
- Stir in the pink food coloring and cherry juice.
- Add the chopped cherries and stir to combine.
- Pour the fudge into the prepared pan.
- Smooth the fudge into an even layer.
- Allow the fudge to set at room temperature for 3-4 hours.
- Cut it into small 1-inch pieces prior to serving.
Serving:
- Chilled Delight: No-Bake Cherry Fudge is best served chilled, straight from the refrigerator. This ensures that it maintains its creamy texture and prevents it from becoming too soft at room temperature.
- Slice with Care: When slicing the fudge into squares, use a sharp knife dipped in hot water to ensure clean cuts. Wipe the knife clean between cuts to maintain neat edges.
- Garnish for Elegance: For an extra touch of elegance, garnish each piece of fudge with a dried cherry on top. This adds visual appeal and hints at the delicious cherry flavor within.
- Accompaniments: Serve No-Bake Cherry Fudge alongside a cup of hot cocoa, coffee, or tea for a delightful pairing. The combination of the rich fudge and warm beverage creates a cozy and satisfying treat.
- Portion Control: Consider cutting the fudge into smaller bite-sized pieces for a bite-sized indulgence. This allows guests to enjoy a taste without feeling overwhelmed by the richness of the dessert.
Storage:
- Refrigeration: Store any leftover No-Bake Cherry Fudge in an airtight container or wrap it tightly with plastic wrap. Refrigerate promptly to maintain freshness and prevent the fudge from becoming too soft.
- Layering for Storage: If stacking multiple layers of fudge, place parchment paper or wax paper between each layer to prevent sticking and preserve the fudge’s texture.
- Freezing: While No-Bake Cherry Fudge can be refrigerated for up to two weeks, it can also be frozen for longer-term storage. Wrap individual pieces tightly in plastic wrap and place them in an airtight container or freezer bag. Thaw in the refrigerator before serving.
- Bringing to Room Temperature: Before serving leftover fudge, allow it to sit at room temperature for a few minutes to soften slightly. This enhances the creaminess and ensures a more enjoyable eating experience.
- Enjoy Within Two Weeks: For the best quality and flavor, consume refrigerated No-Bake Cherry Fudge within two weeks of preparation. While it may still be safe to eat beyond this time frame, the texture and taste may deteriorate over time.
FAQs:
- Can I use fresh cherries instead of dried cherries in this recipe?
- While dried cherries are recommended for their concentrated flavor and chewy texture, you can use fresh cherries if desired. However, be sure to pit and finely chop them before adding them to the fudge mixture.
- Can I substitute condensed milk with another ingredient for a dairy-free option?
- Yes, you can use condensed coconut milk or a dairy-free condensed milk alternative to make this fudge recipe dairy-free. Ensure the substitute has a similar thickness and sweetness to traditional condensed milk.
- How long does it take for the fudge to set in the refrigerator?
- The fudge typically takes around 2 to 4 hours to set in the refrigerator. However, this may vary depending on factors such as the size of the pan and the temperature of your refrigerator.
- Can I add nuts or other mix-ins to the fudge?
- Absolutely! Chopped nuts, such as pecans or almonds, can add a delightful crunch to the fudge. You can also mix in shredded coconut, mini chocolate chips, or even crushed graham crackers for added texture and flavor.
- Is it necessary to line the pan with parchment paper?
- While lining the pan with parchment paper makes it easier to remove the fudge once it’s set, it’s not strictly necessary. If you prefer, you can grease the pan lightly with butter or cooking spray instead.
Conclusion:
In conclusion, No-Bake Cherry Fudge is a heavenly combination of creamy fudge and fruity cherry goodness that’s sure to delight your taste buds. With its simple preparation, customizable flavors, and convenient storage, this delectable treat is a must-try for any dessert lover. Whether you’re craving a sweet pick-me-up or looking for a show-stopping dessert for your next gathering, No-Bake Cherry Fudge is sure to impress.